Part 2
1. {optional} with a fabric marker mark the outline on your shade for where you want your trim.

2. {optional} attach your ribbon to your shade. you can do it 2 ways, either aren't great, but the first is better. the first way is using stitch witchery and ironing the ribbon on. the drawback being that it shrinks down as you work with it. the other option is shown here with fabric glue. the drawback - if you're using a light ribbon the sun shines through and highlights the glue when the shade is up.

3. Draw out on a piece of paper how many rod pockets you will need. Take your measurements from your previous sketch and add a 1" space where you have your pleat marked to go. This is for the rod pocket.
4. Using your fabric marker, mark all rod pocket allowances along your shade. It should look like the image above and you can see part of it in the photo below.
5. Now to sew your rod pockets. Start from the bottom and fold your first 1" marking in half and pin. Sew a straight stitch all the way across. It is very important that you have your tension LOW and your stitch the LARGEST your machine will allow. This will keep the fabric from puckering and pulling while you sew. If you omit this step, you'll end up with an overhang, when you want the rod pocket to line up perfectly. Work up the length of your shade until you've created all your pockets.
6. This is what it will look like when you're finished. Now is the time to press out any wrinkles. Once you add your ribs, you won't be able to.
7. Insert your ribs through the pockets. Cutting 1/4" shorter than the shade on each side. Hopefully they fit :/ They're supposed to be tight so they don't shift.
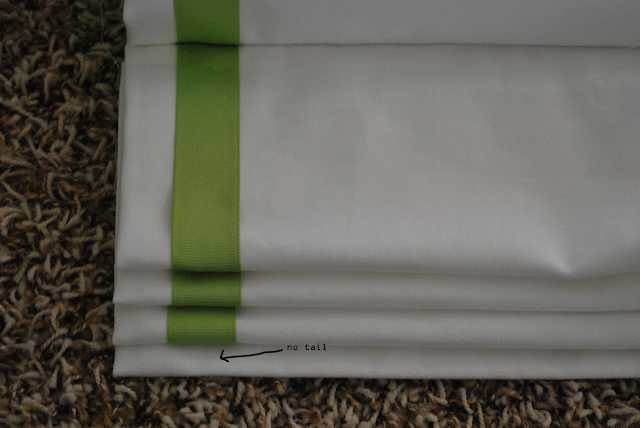
yesterday, in part 1, i told you i made my bottom pleat 1 1/2" longer than the normal 1/2 the regular pleat. here are the photos to hopefully help explain this better. i wanted my trim visible while my shade was open, so to allow for that i had to add the extra length...
...otherwise it would look like this and my bottom trim would be hidden when it was open.
8. Now for the rings. Depending on the size of your window, you may or may not, have a ton of these to sew on. if you do, i highly recommending looking for a youtube video that explains how to do this with your botton foot. Otherwise use upholstery thread and get to it! Refer back to your original drawing to see where your rings need to be sewn. You'll sew them on every pleat just above your rod pocket stitch. Make sure to go through all layers of fabric.
This is what the ring stitch looks like on the front of the shade.
9. Inert your weight rod into the 1 1/2" hem.
I'll see you back here tomorrow for the 3rd and last part of the tutorial.


Natalie this is sooo fancy. I am so impressed. You go girl.
ReplyDeleteI am quite impressed with your beautiful blog. I am now a follower!
ReplyDeleteI am so glad i saw your post! I am made a shade recently but the rings are comming unsewn, i was told to knot the bobbin thread what does that mean? If you have any advice i would appreciate it.
ReplyDeleteI am so glad i saw your post! I am made a shade recently but the rings are comming unsewn, i was told to knot the bobbin thread what does that mean? If you have any advice i would appreciate it.
ReplyDeleteNatalie this is sooo fancy. I am so impressed. You go girl.
ReplyDeleteThe post is a tutorial on roman shades and is giving excellent points
ReplyDelete